Run Your LINE Bot Backend on Cloudflare Workers: Deploy the Worker + Set Up the Official Account Webhook
Deploy a Cloudflare Worker with one Claude Code command, then enable the Messaging API and Webhook in the LINE Official Account console — turning your LINE account into a 24/7 AI bot.
 卡住很正常——點段落旁的 😵 卡關 讓我們知道,或直接往下滾到問答區發問。
也可以用 👍 看懂 / 😢 看不懂 告訴我們哪裡寫得好、哪裡要改。
卡住很正常——點段落旁的 😵 卡關 讓我們知道,或直接往下滾到問答區發問。
也可以用 👍 看懂 / 😢 看不懂 告訴我們哪裡寫得好、哪裡要改。
Why Run Your LINE Bot Backend on Cloudflare Workers?
To make a LINE Official Account “reply on its own,” you need a backend that is online 24/7 and processes messages the instant they arrive. The traditional approach is renting a cloud server — but for individuals or small projects that’s expensive and a hassle to maintain.
Cloudflare Workers makes this simple:
| Comparison | Cloudflare Workers | Self-hosted server |
|---|---|---|
| Startup speed | Global edge nodes, millisecond cold starts | Pick a data center yourself |
| Cost | 100k requests/day free | Monthly rent at minimum |
| Maintenance | No OS, no updates to manage | You manage the OS and security |
| Deploy | One wrangler deploy | SSH and a pile of config |
| Public URL | HTTPS URL auto-assigned on deploy | Set up your own domain & cert |
In short: you only write the message-handling code; Cloudflare handles where it runs, whether it stays up, and the URL. That public HTTPS URL is exactly the Webhook URL LINE uses to push messages to you.
💡 New to the Bot Webhook concept? Start with the Telegram Integration Complete Guide — it walks you through the same flow with the simpler BotFather first.
Prerequisites
Before you start you’ll need:
- A LINE Official Account (create one free at LINE Official Account Manager)
- A Cloudflare account (free plan is fine)
- Claude Code and wrangler (Cloudflare’s CLI deploy tool) installed locally
- A Worker script already written (receives LINE messages, calls the AI, returns the result)
The flow has two halves: deploy the backend and get its URL, then go back to the LINE console to paste that URL in and turn on the Webhook.
Step 1: Deploy the Cloudflare Worker with Claude Code
Open Claude Code in your project directory and have it handle the Cloudflare setup and deploy. A complete deploy usually covers:
wrangler login: log into your Cloudflare account- Set up KV / R2 storage (if your Bot needs to remember conversations)
wrangler secret put: store secrets like the LINE Channel secret encrypted (never hardcode them)wrangler deploy: push it live — when done it returns a Webhook URL
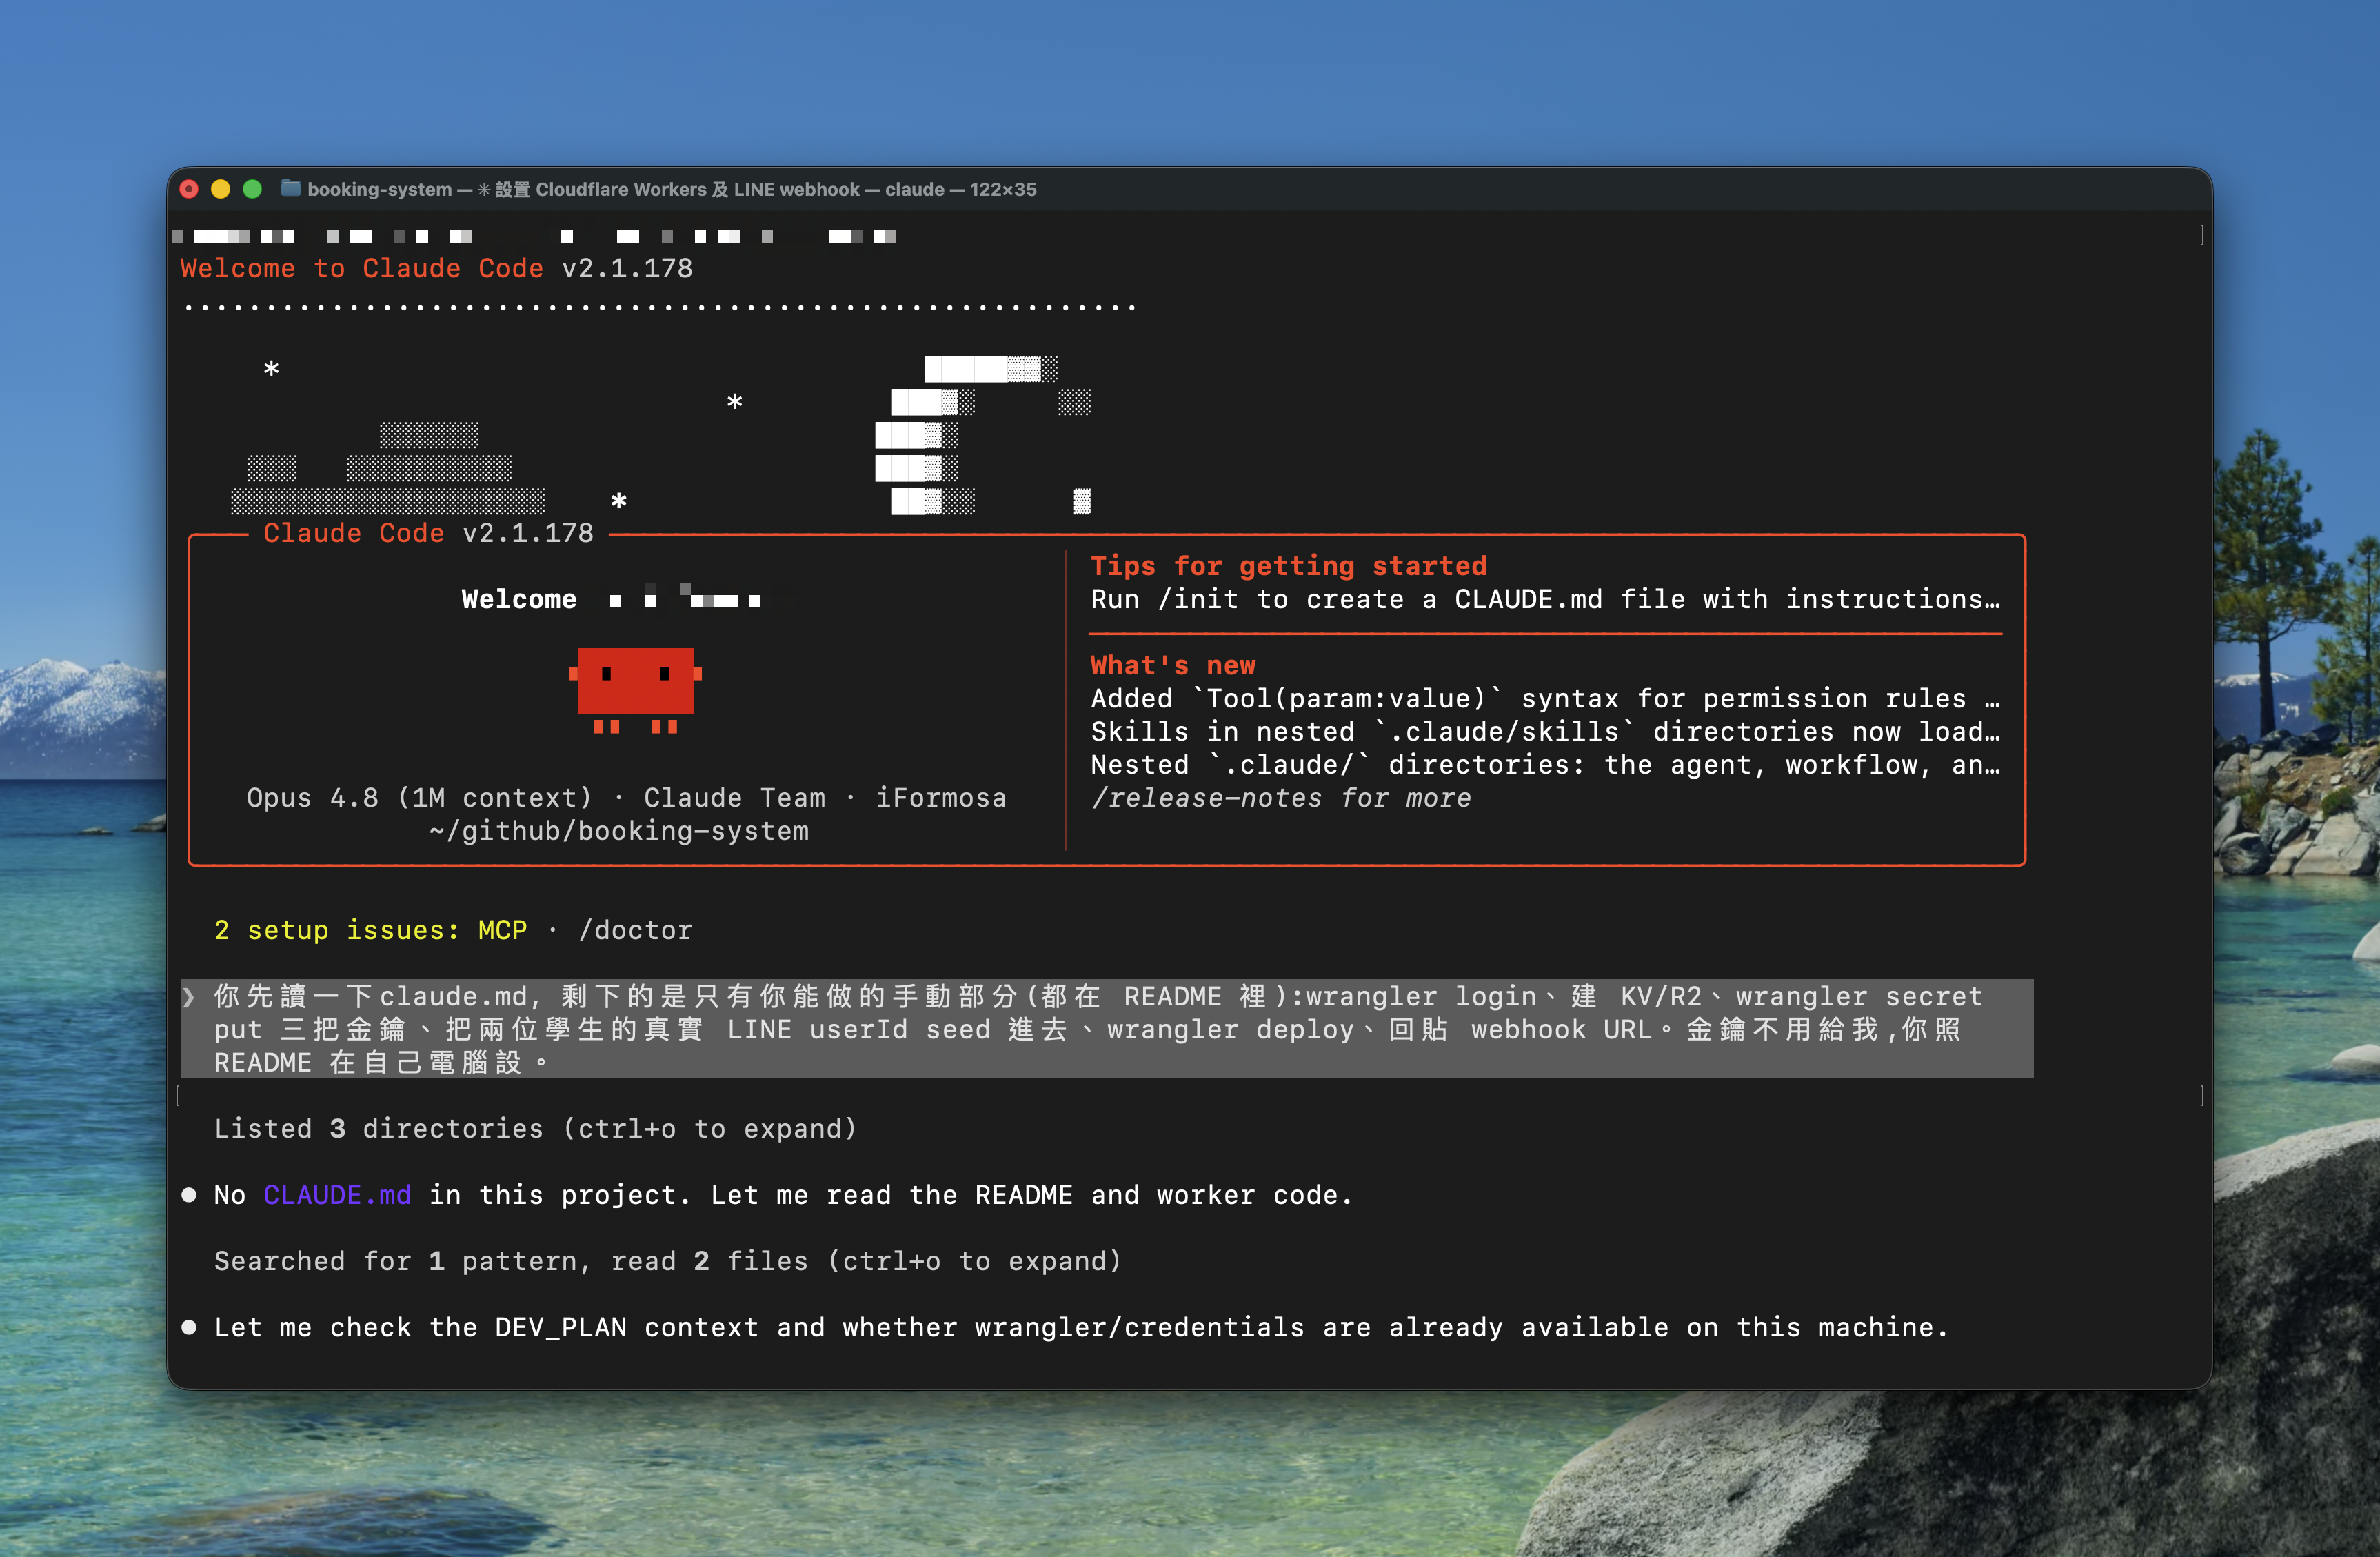
After a successful deploy, the terminal prints a URL like https://your-worker.xxx.workers.dev. Write it down — you’ll paste it into the LINE console shortly.
⚠️ Secrets like the Channel secret and access token should always be stored with
wrangler secret put— never commit them to Git.
Step 2: Open the LINE Official Account Console
Go to LINE Official Account Manager, log in, pick your official account, and land on the home page. Click “Settings” in the top right.
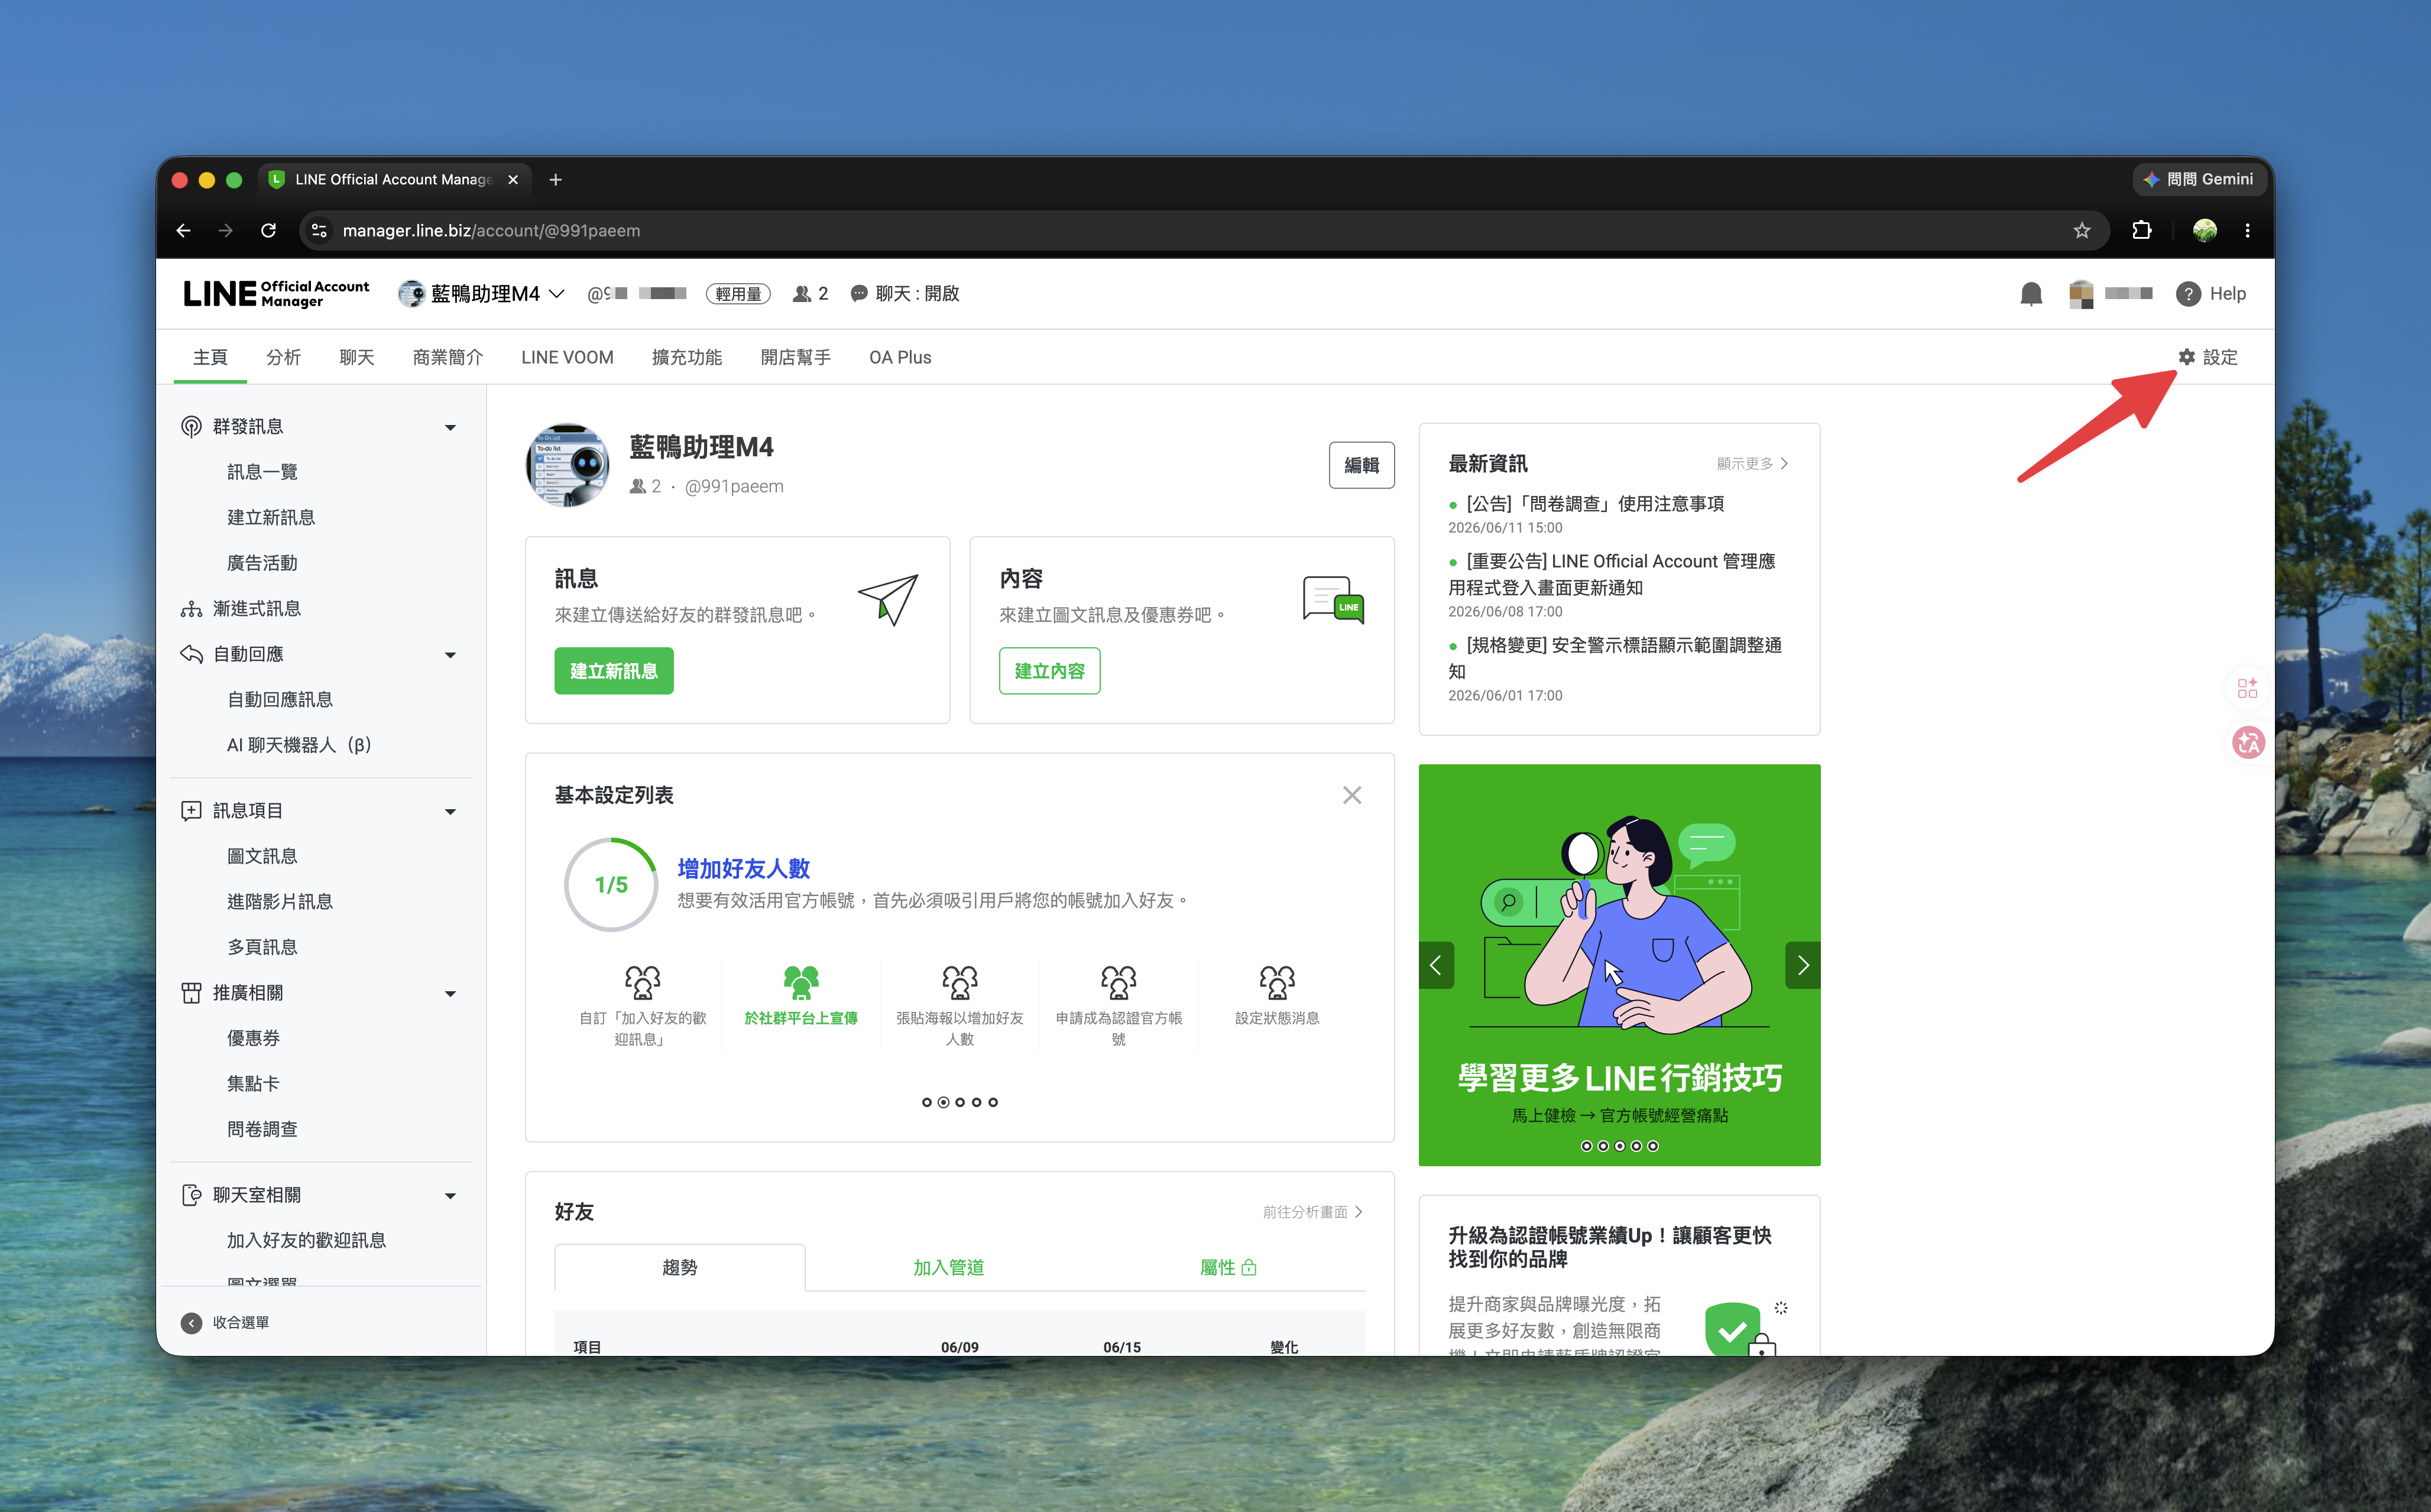
Step 3: Enable the Messaging API and Grab the Channel Info
In the left menu of the settings page, find Messaging API. Three key pieces of info live here:
- Channel ID: the channel identifier
- Channel secret: the key used to verify request origin (the one you
wrangler secret putin the previous step) - Webhook URL: fill in the Worker URL from Step 1
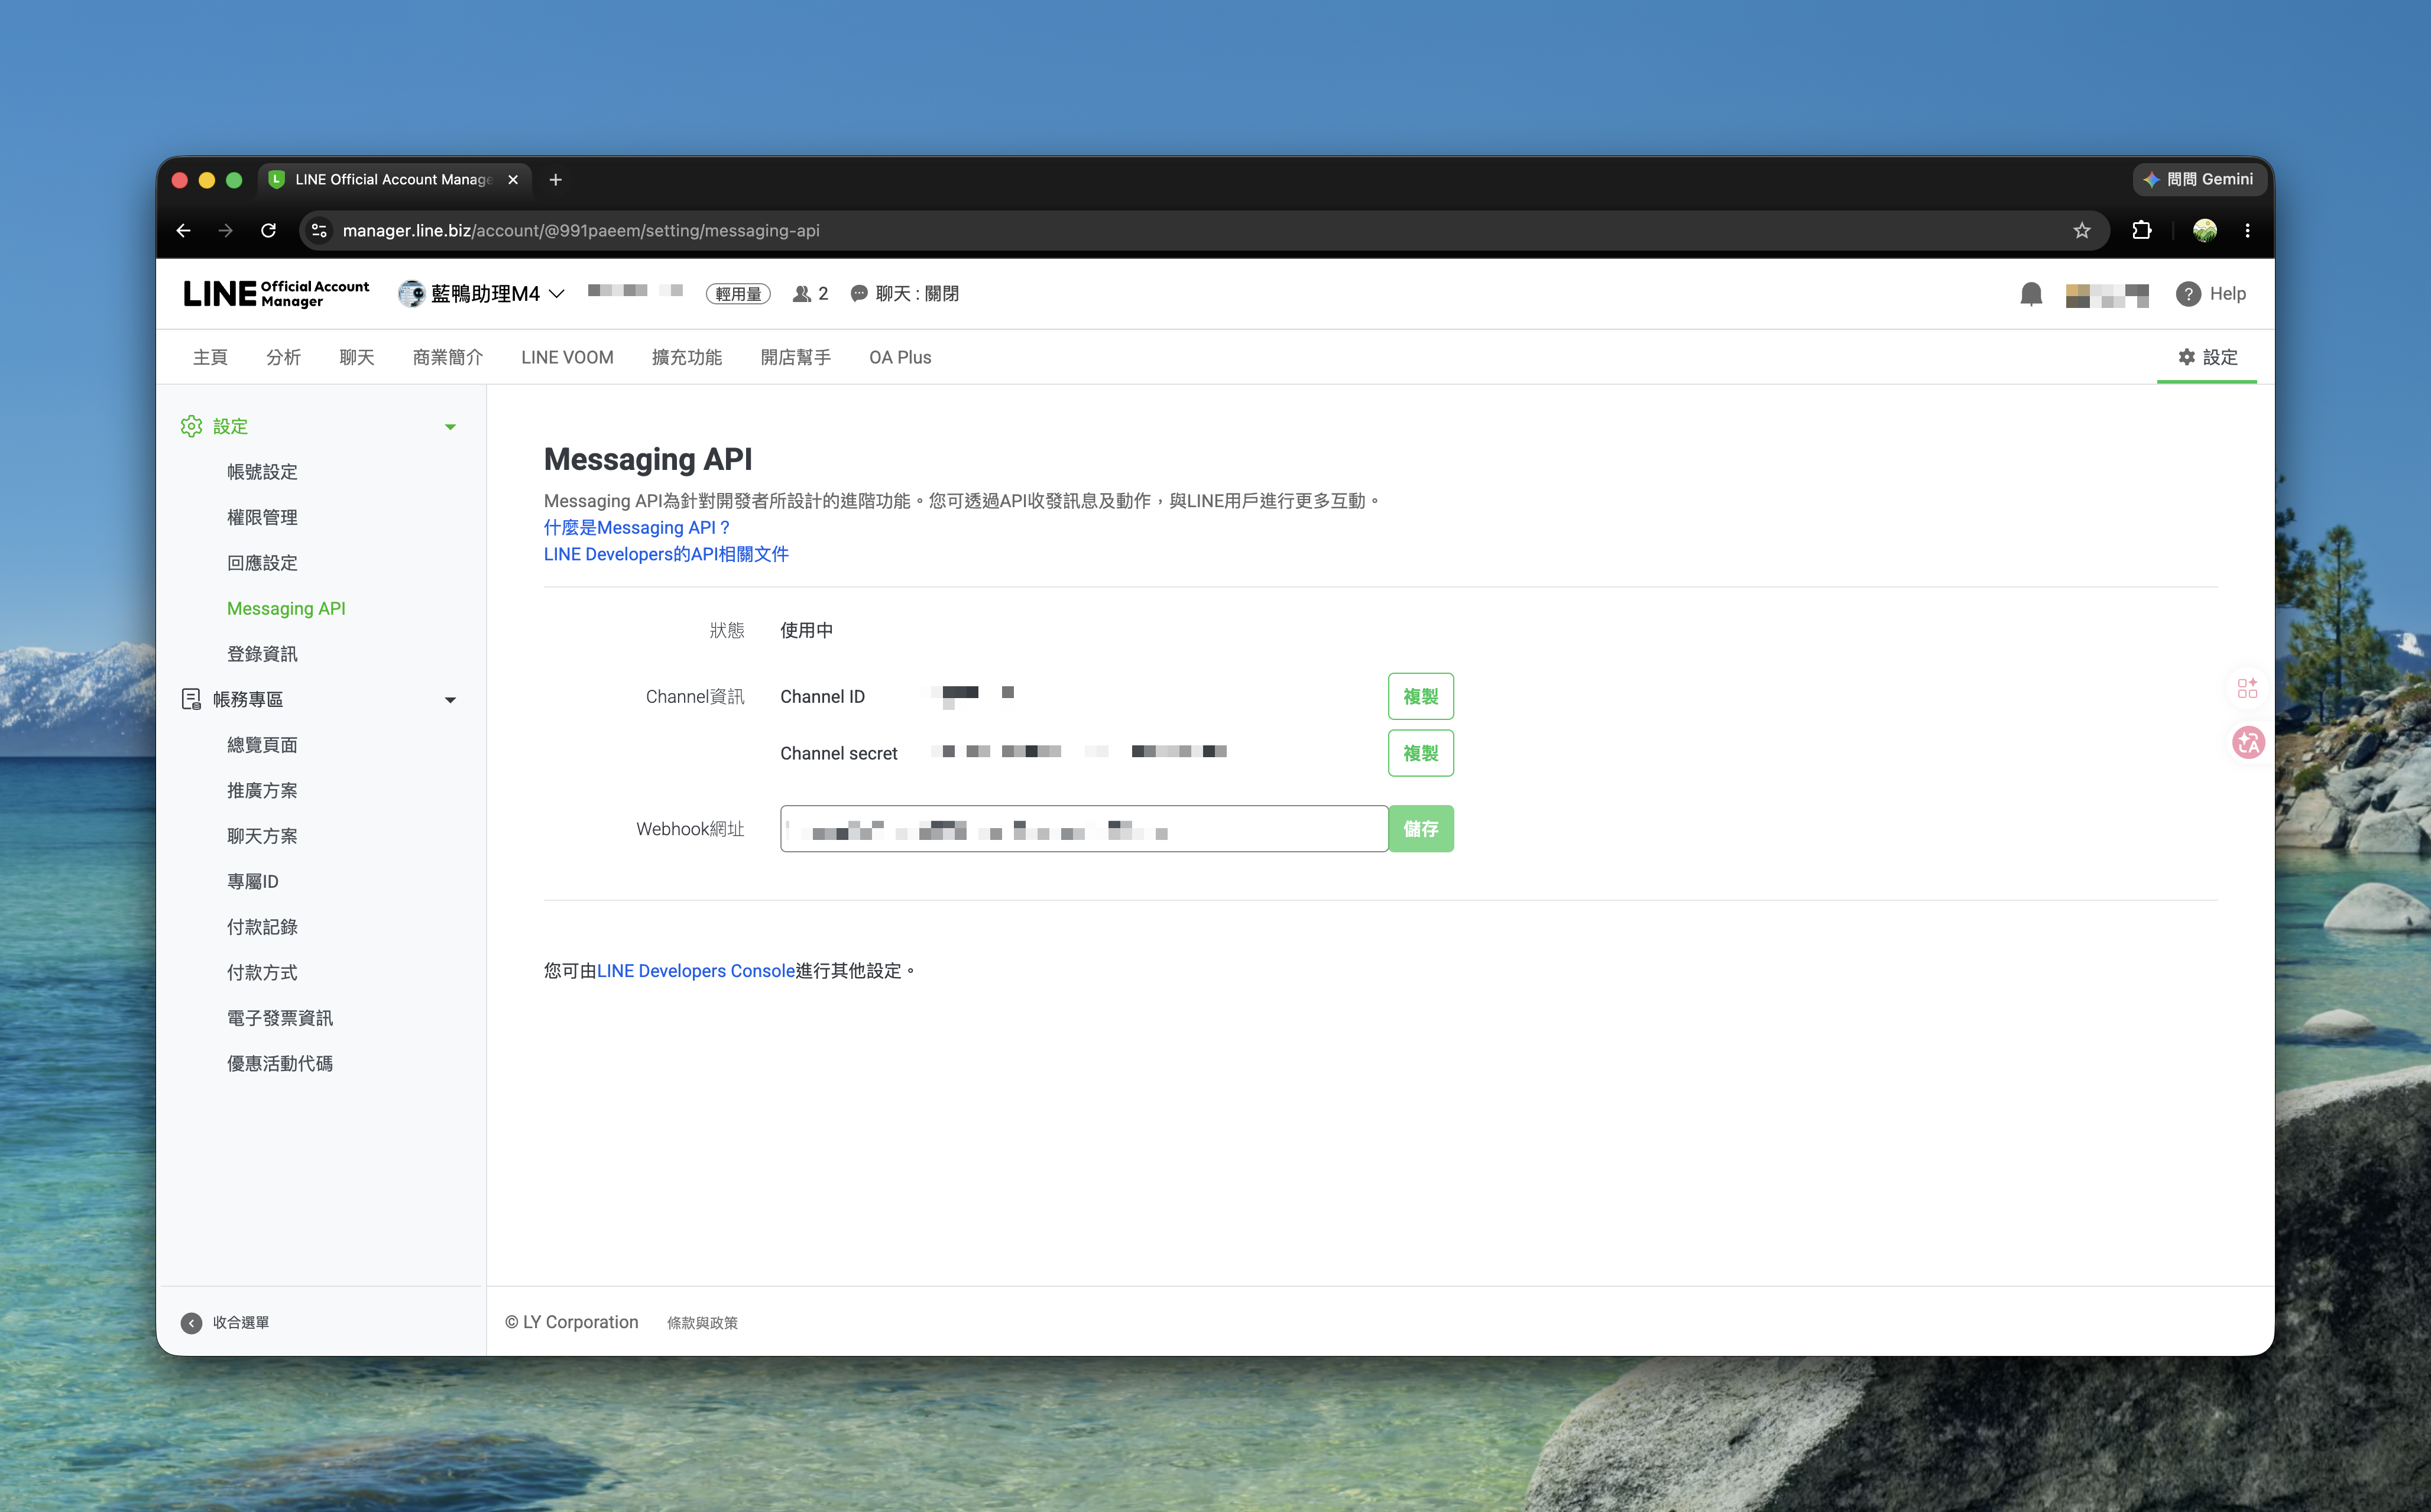
Fill the Webhook URL field with your Worker URL and click Save.
🚨 Common mistake: the secret doesn’t match If the Bot receives messages but keeps returning 401 / verification failures, the Channel secret stored in your backend usually doesn’t match the one shown here. Go back to Step 1 and re-store it with
wrangler secret put.
Step 4: Turn On Webhook in “Response Settings”
Filling in the URL isn’t enough — you need to tell LINE to hand messages to the Webhook. Go to “Settings → Response settings.” There are a few toggles here; set them like the screenshot below:
- Chat: off (no live human chat)
- Webhook: on (this is the key — only then does LINE POST message events to your Worker)
- Auto-reply messages: leave it on for now; the next step only disables the default canned message
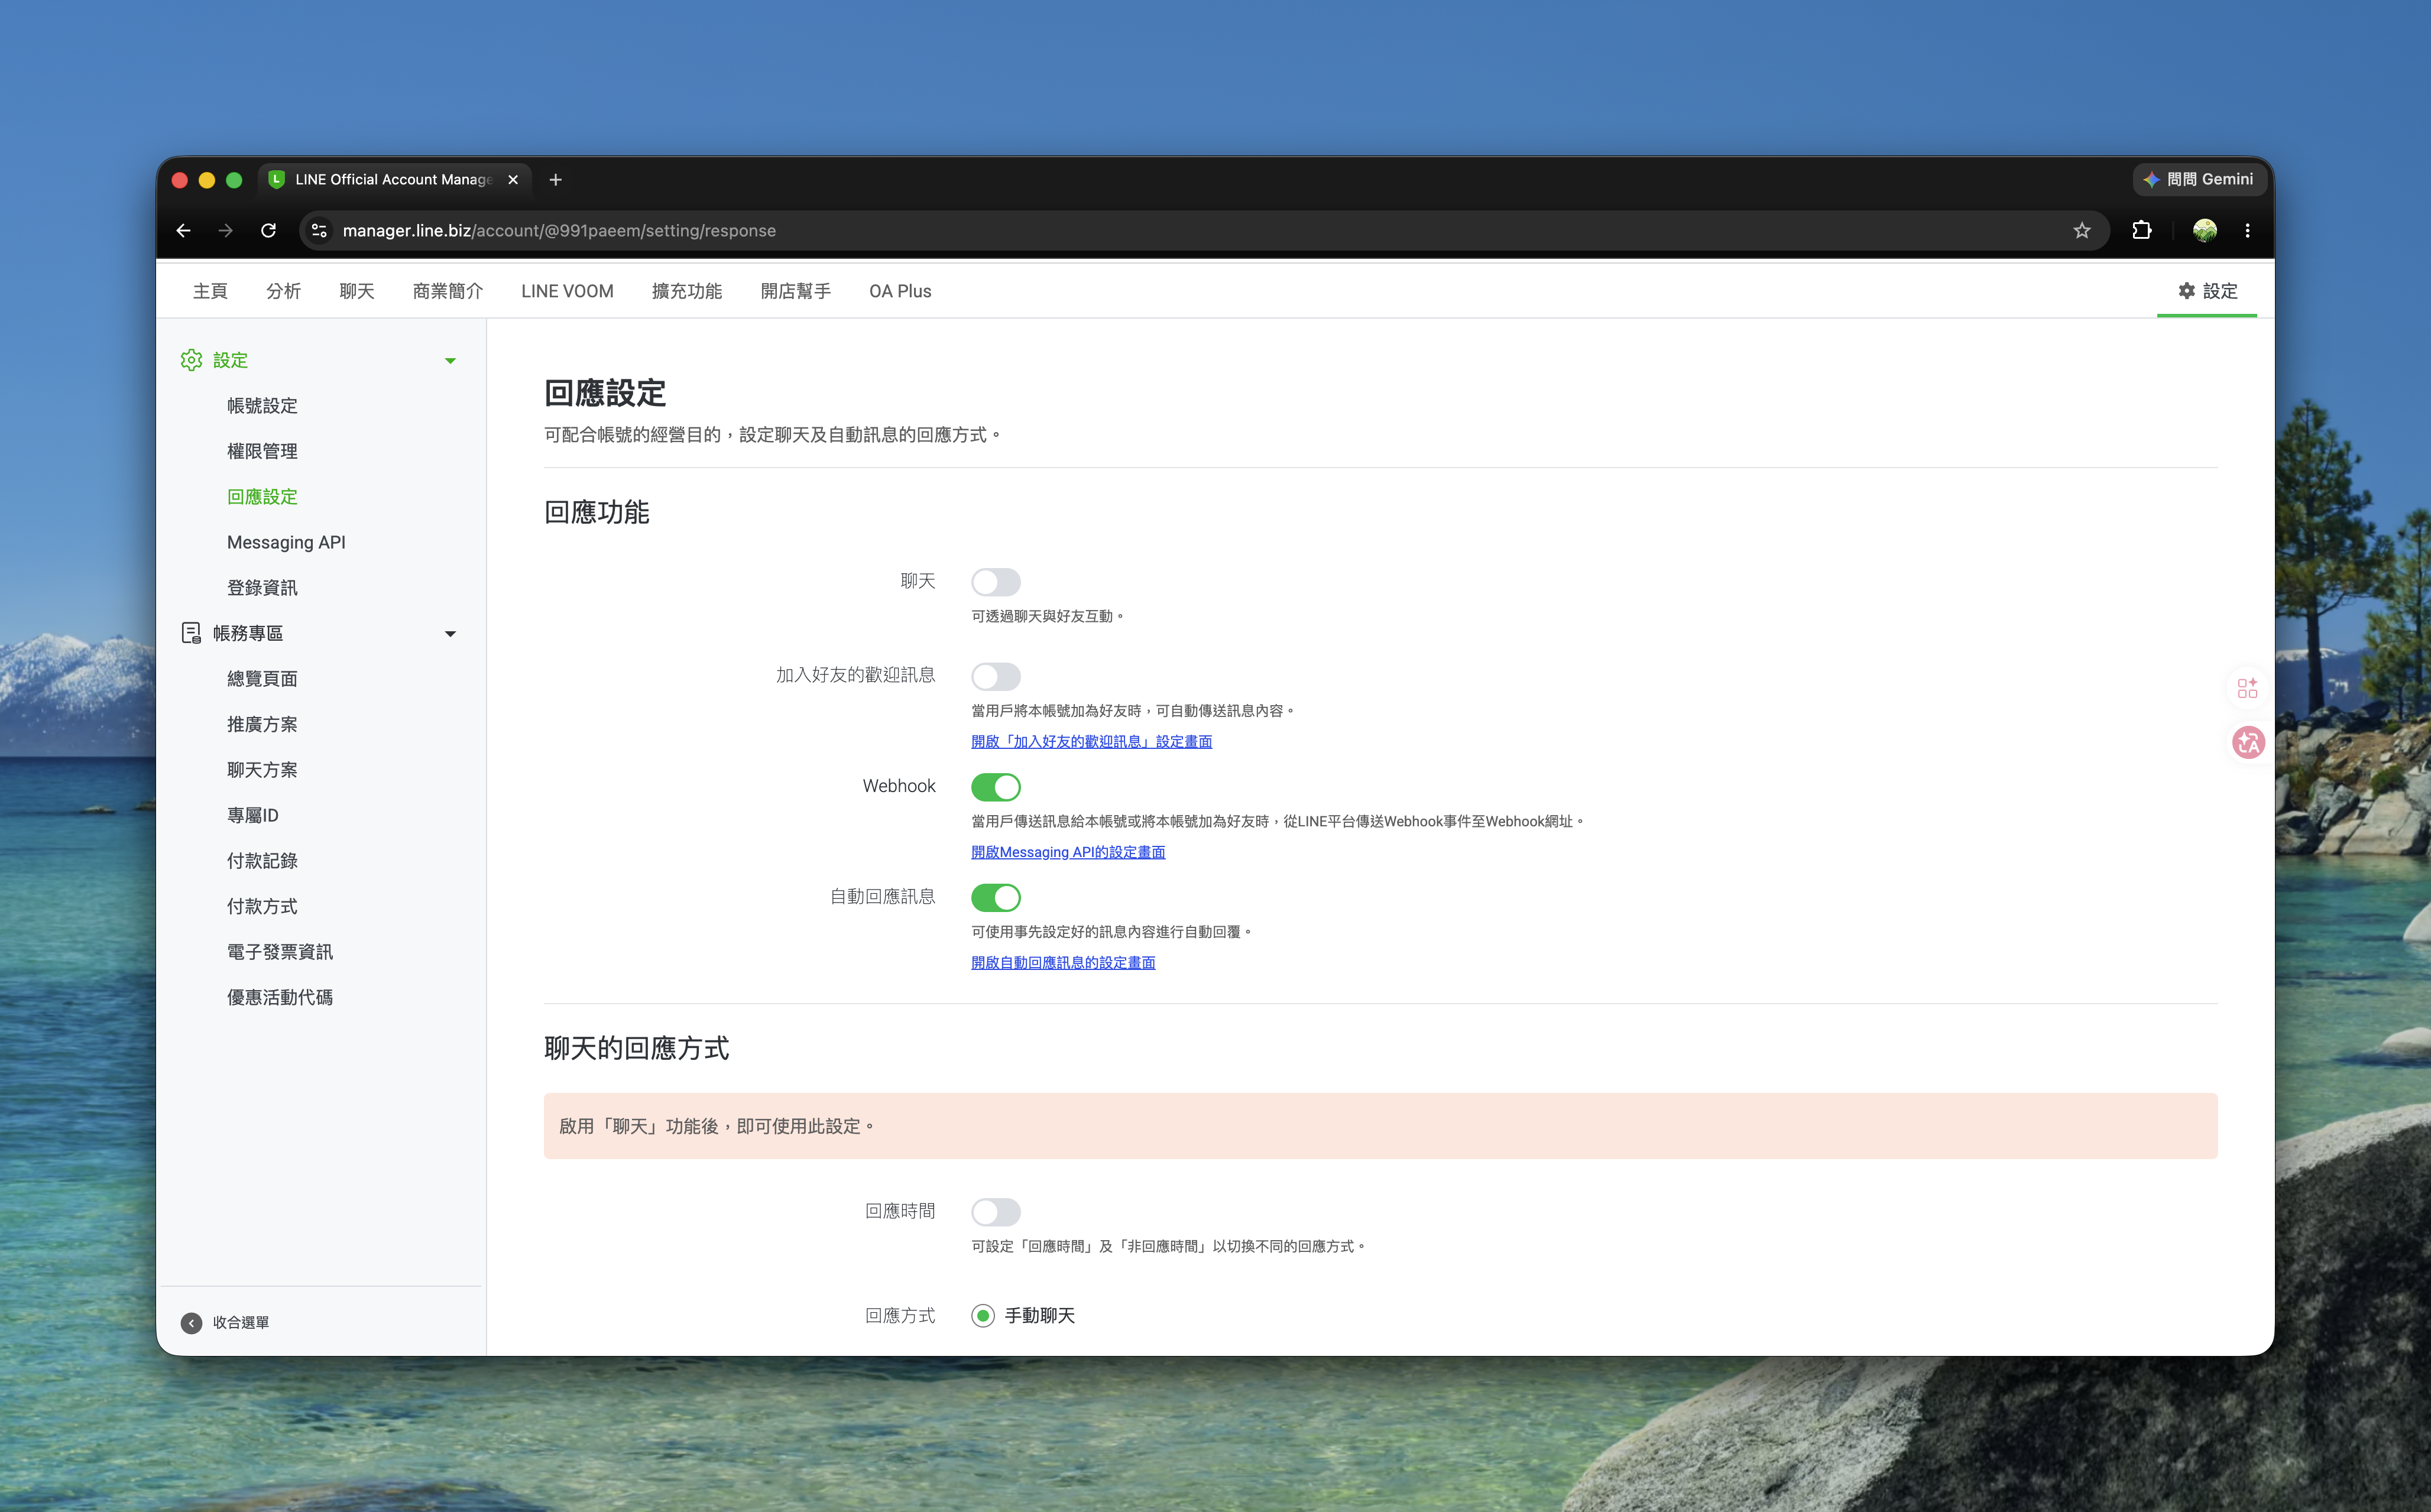
💡 (Optional) Let the Bot be invited into groups: under “Settings → Features,” you can enable “Accept invitations to groups and multi-person chats” so you can later add the Bot to group chats.
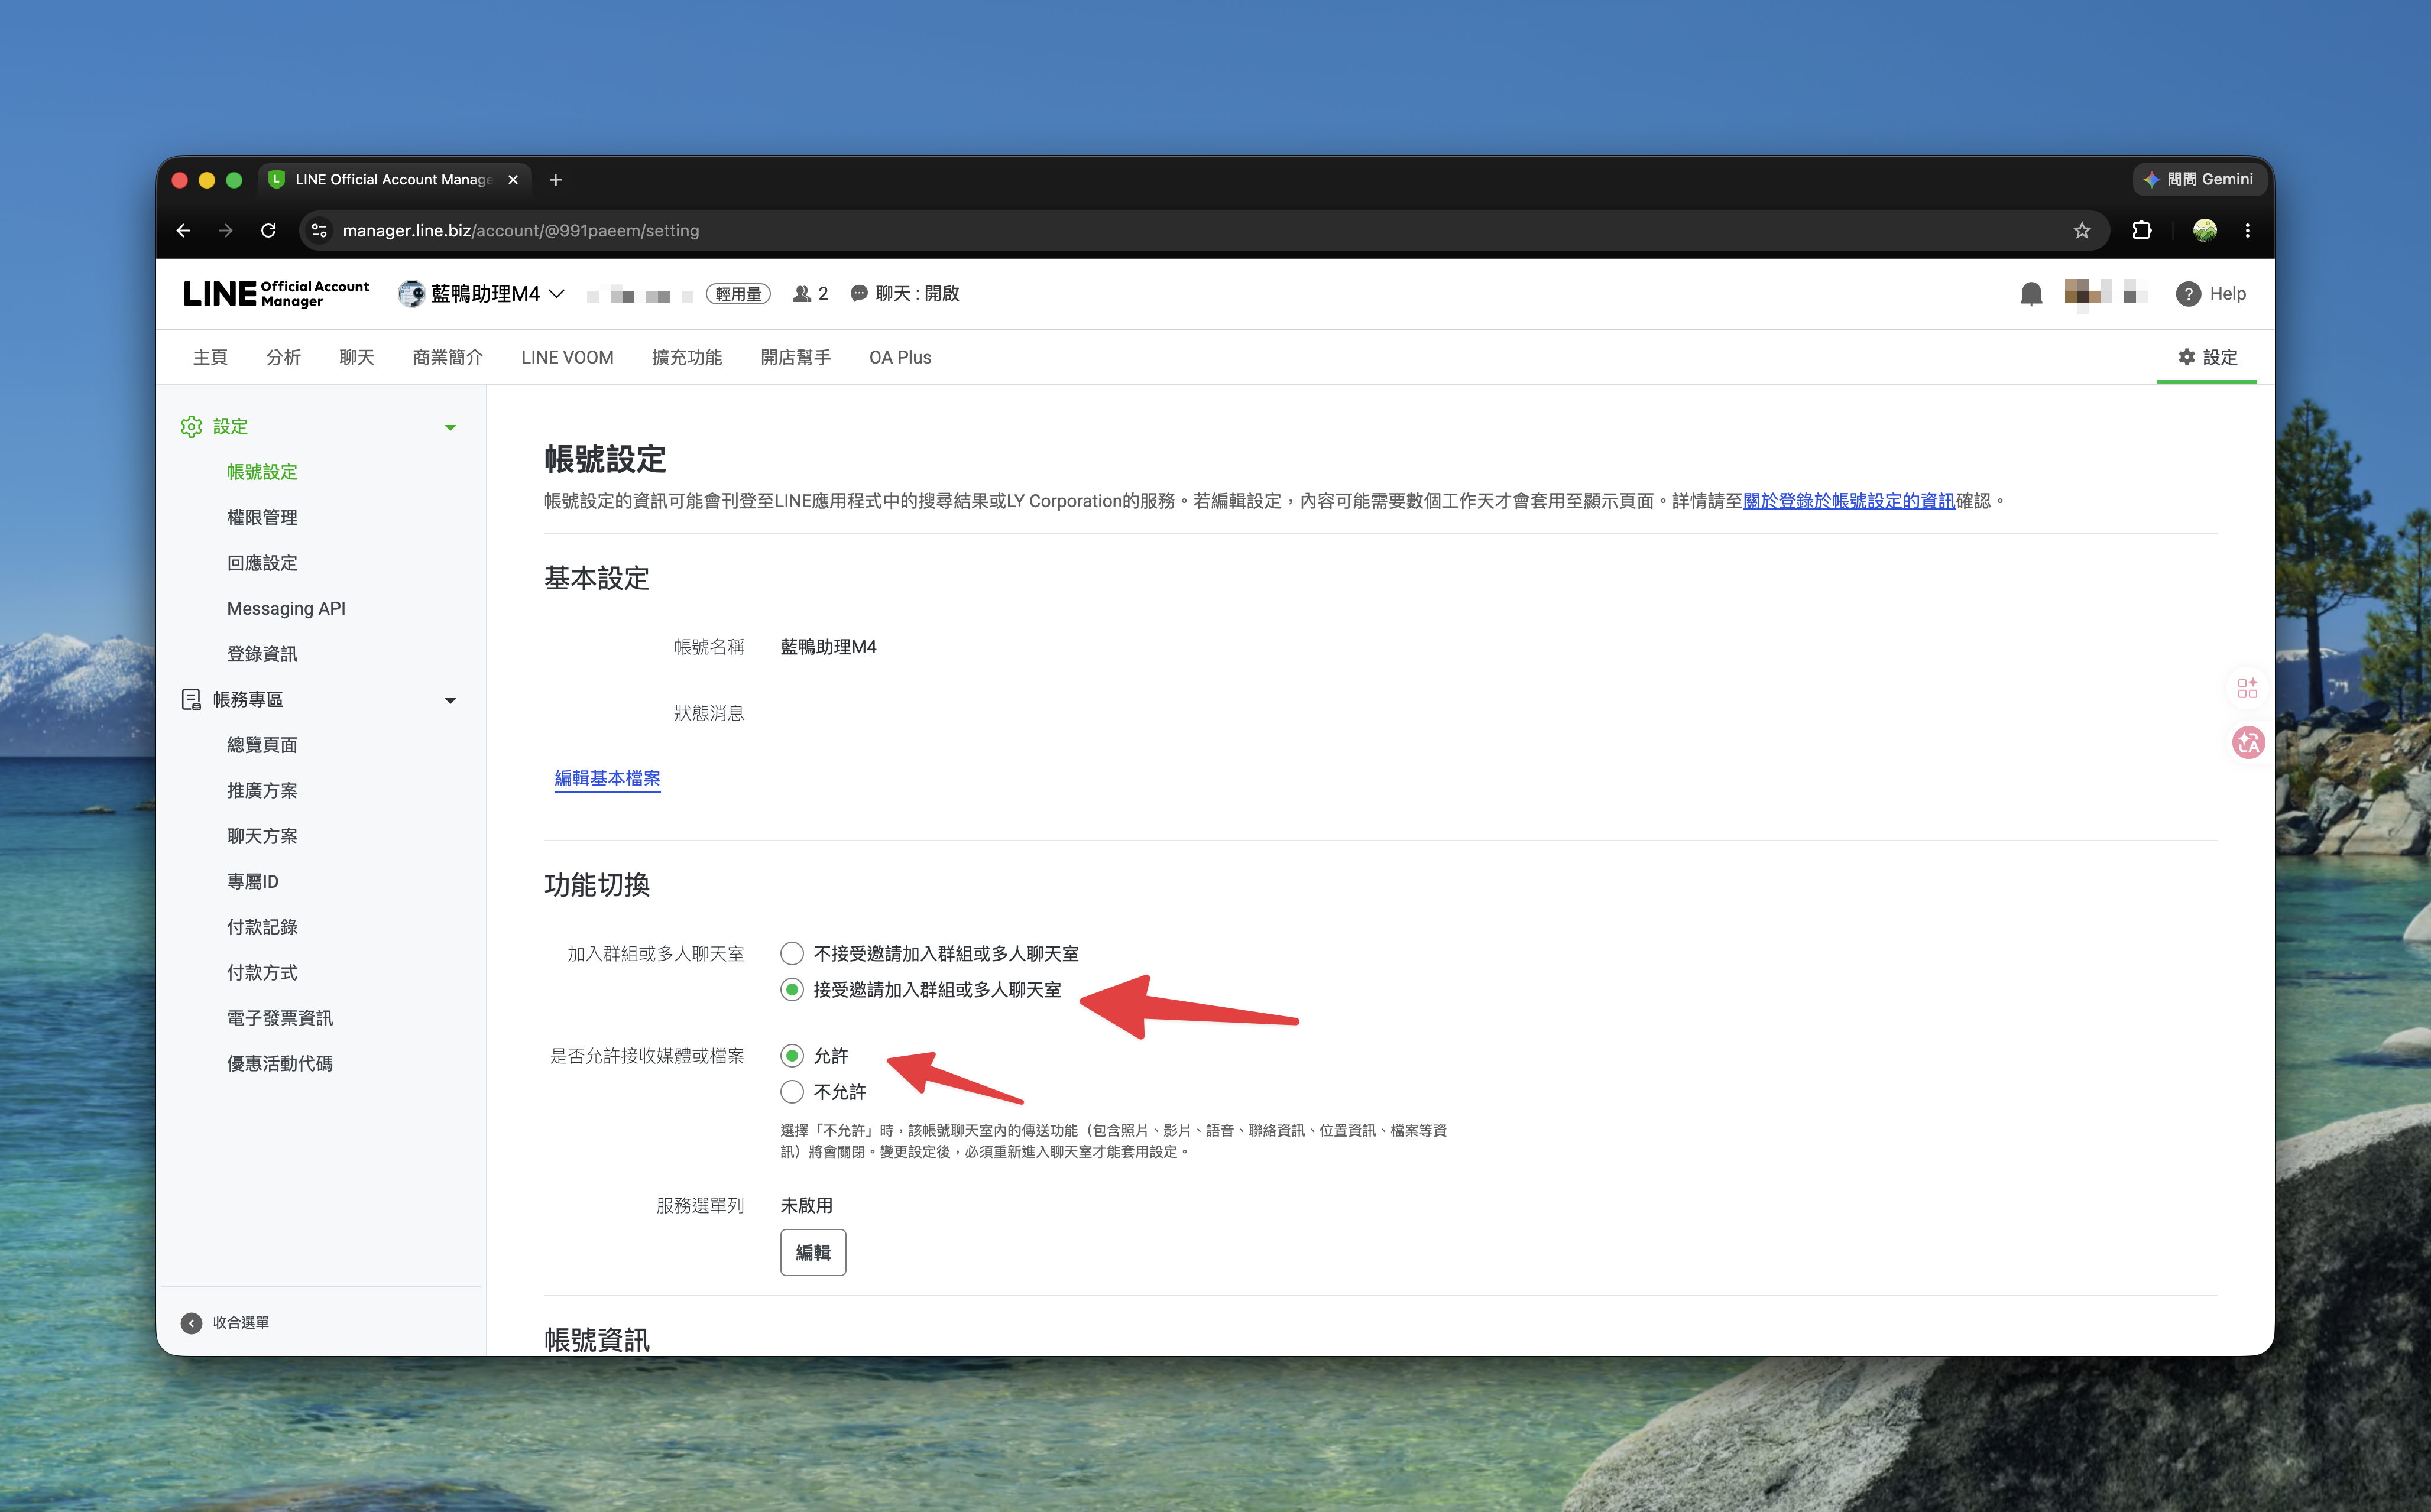
Step 5: Disable the Default Auto-Reply Message
By default LINE has a canned auto-reply that competes with your Bot, so users get two messages. Turn it off.
Under “Auto-reply messages,” switch off the default one.
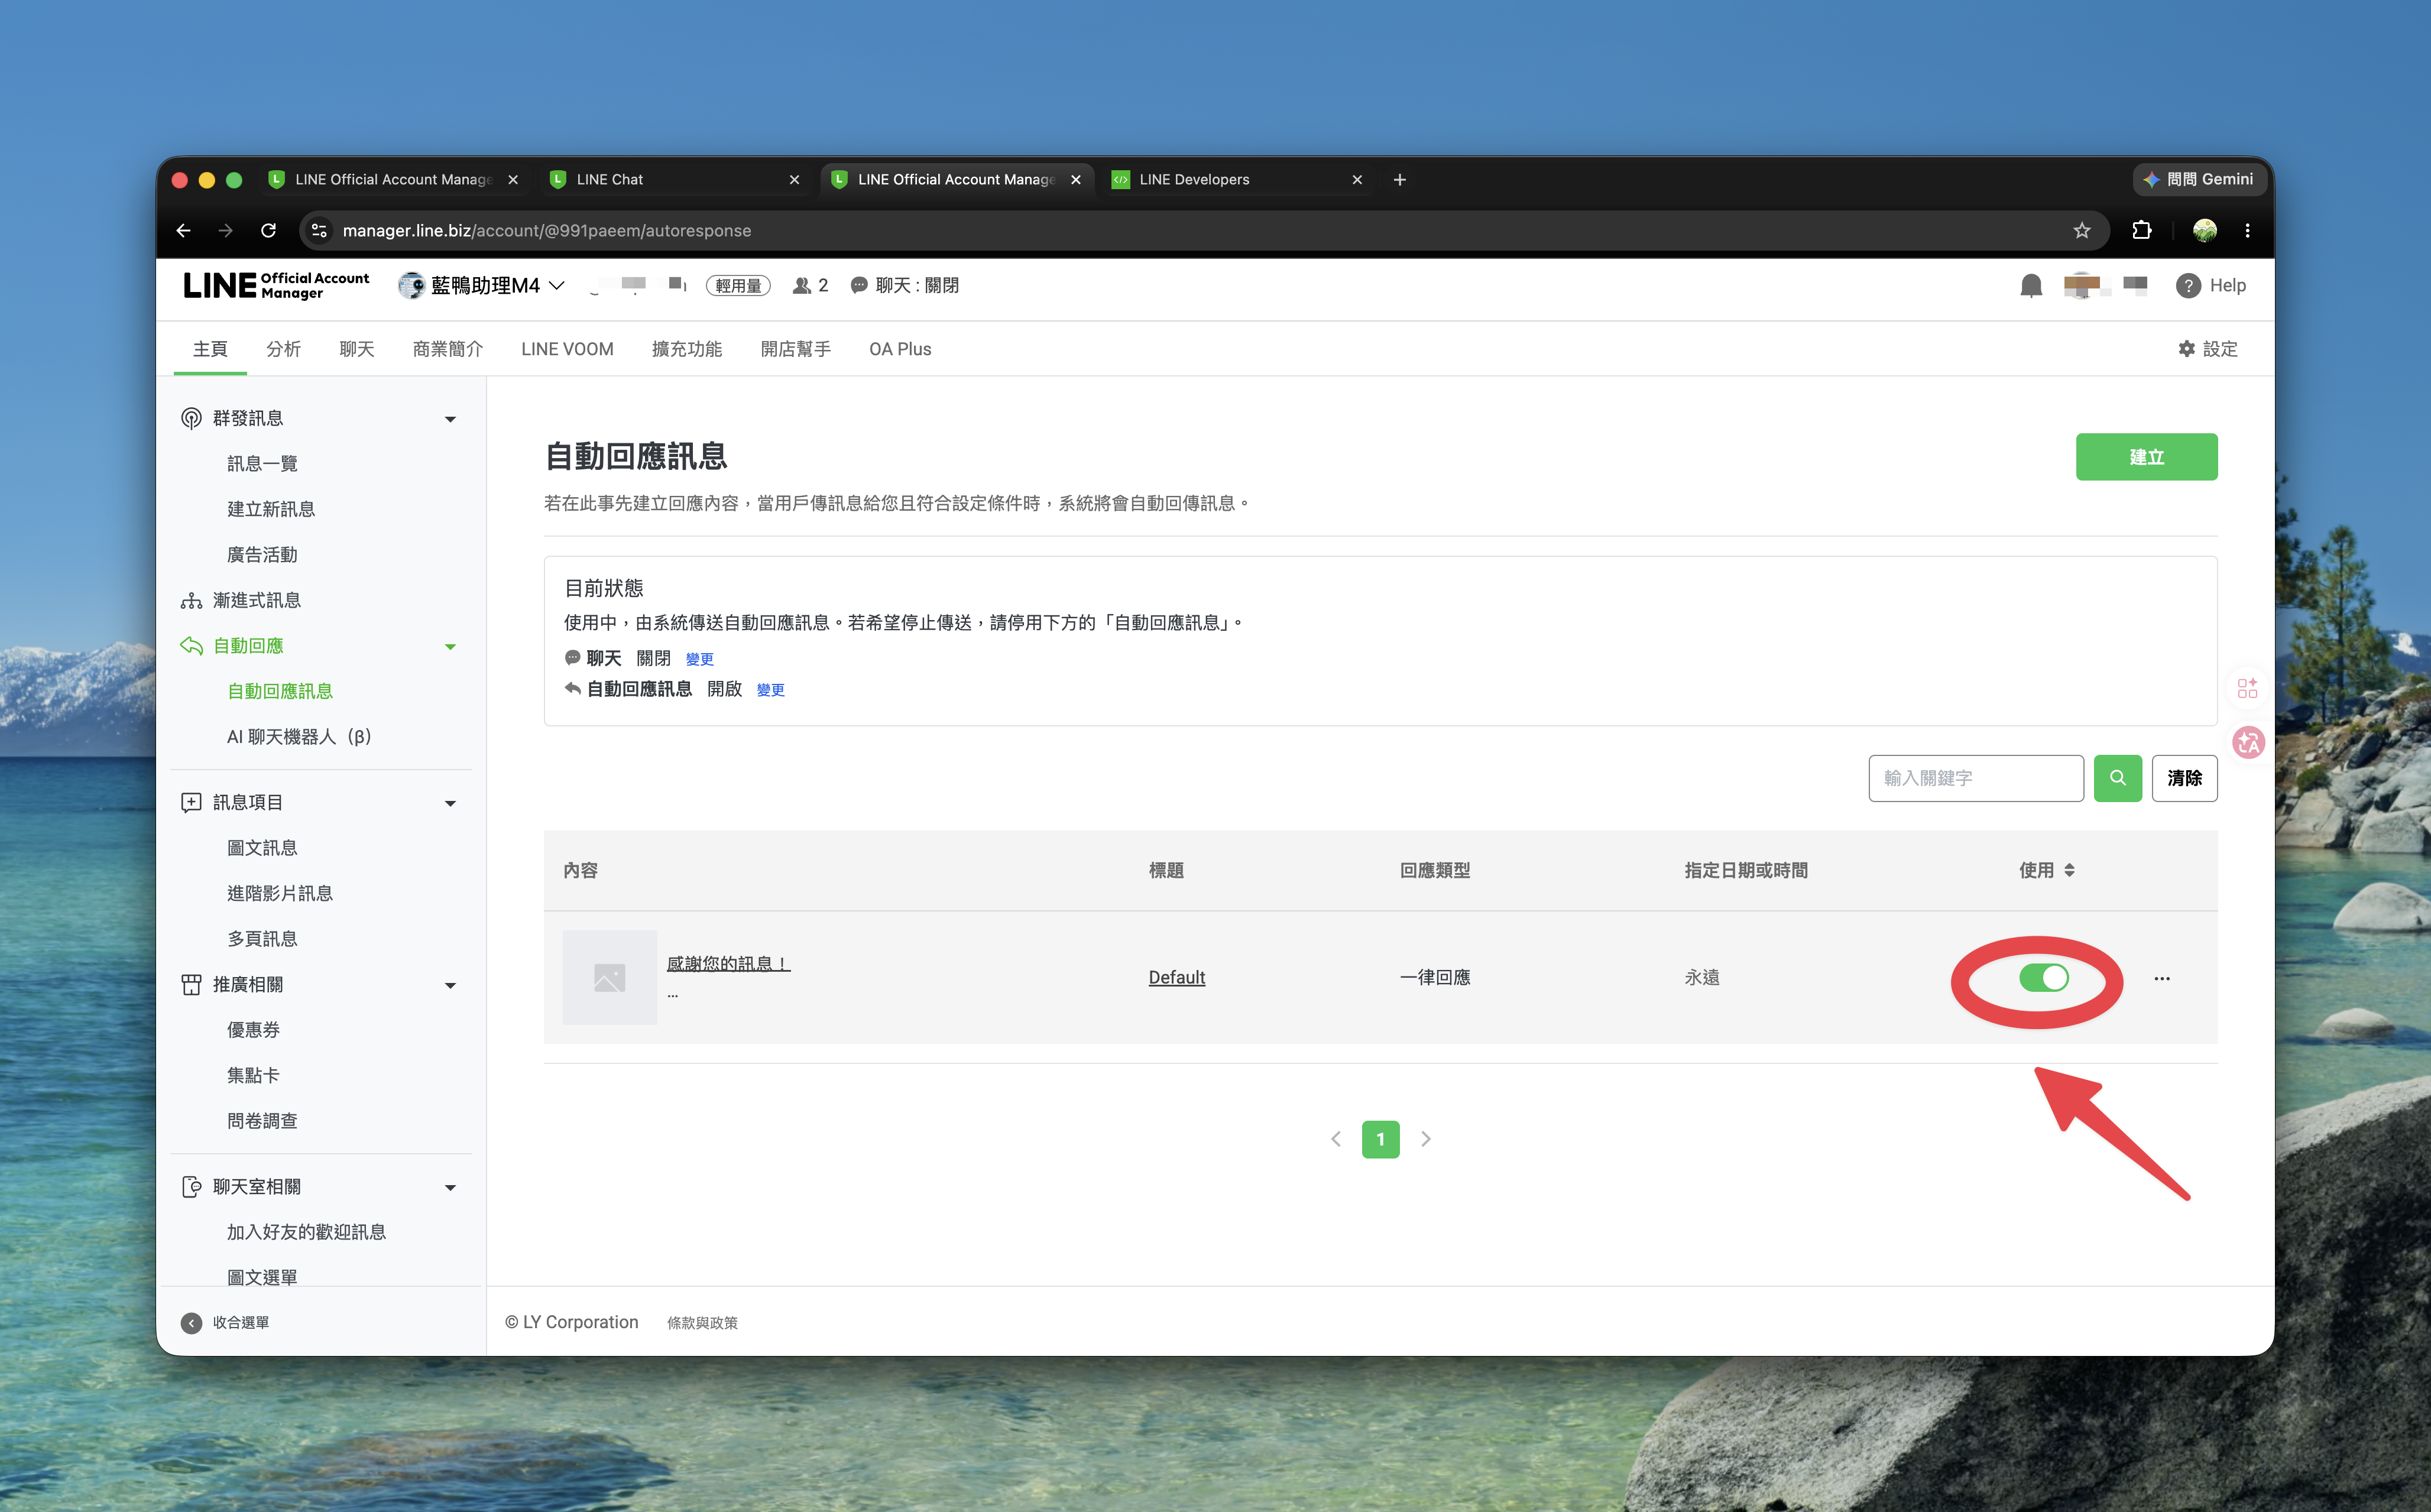
Verify It Works
- Add your official account as a friend on your phone
- Send any message
- Within seconds you get a reply processed and returned by your Worker — success!
If nothing happens, use wrangler tail to watch the Worker logs live and see whether messages are arriving and where it’s failing.
Troubleshooting
🚨 Bot replies twice to one message
The default auto-reply isn’t off (see Step 5), or the response mode is still on “Chat” instead of Webhook (see Step 4).
🚨 Edited the code, but nothing changed on LINE
Cloudflare Workers don’t auto-update — run wrangler deploy again after every change. The Webhook URL stays the same, so no need to touch the LINE console.
🚨 Receiving no messages at all
Check in order: is the Webhook toggle on (Step 4) → is the Webhook URL filled in correctly and saved (Step 3) → use wrangler tail to see whether requests reach the Worker.
Next Steps
- Want the Bot to remember conversation context? Learn about how AI Agents handle memory
- Want to connect more services (calendar, databases, external APIs)? See how the MCP protocol wires tools into the AI
這篇文章對你有幫助嗎?
💬 問答區
卡關了?直接在這裡問,其他讀者和作者都能幫忙解答。
載入中...